Have you checked out the Hatch Dashboard yet!? It’s super exciting and your fellow TEC members have been working extremely hard on it! The Dashboard is the tool we’re using to decide our pre-hatch parameters and compare results. It is extremely important to battle-test our parameters so that we do not goof-up our fledgling commons (or create holes in the fabric of space and time). It’s a bit overwhelming at first but let’s take you through it. Prepare yourself for:
The Hatch Dashboard:
We have Param Parties happening twice weekly if you want to jump in and jam with your fellow TEC members; and make some badass parameters. We will have a parameters expert on hand to help answer any questions you might have during the process. Stay abreast of when the next Param Party is on the TEC calendar. You can also check the times for each Param Party in this forum post.
The first thing you should do is to familiarize yourself with the parameters of the Hatch (there is an exhaustive list in the Hatch Spec on the forum). It’s important to read it so you understand what the parameters represent. For a quick up-to-date summary, here is what you need to know:
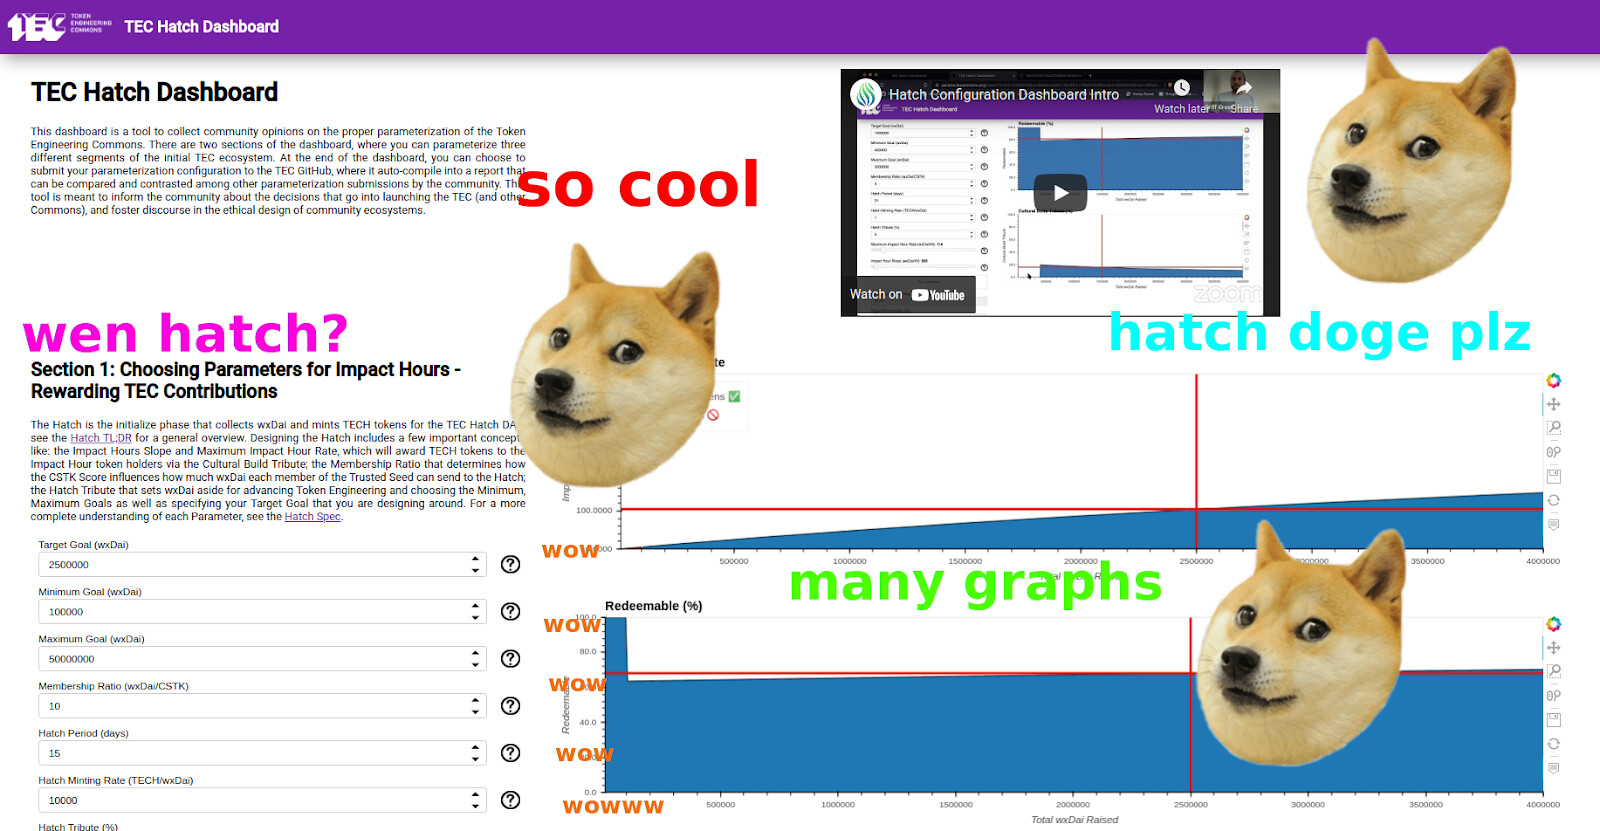
Section 1: Choosing Parameters for Impact Hours - Rewarding TEC Contributions -
- Minimum Goal: The minimum amount that needs to be collected during the Hatch to create the TEC HatchDAO. If less than this is collected, the funds will be sent back to the addresses that sent it.
- Maximum Goal: The maximum amount of wxDai that can be sent to the Hatch.
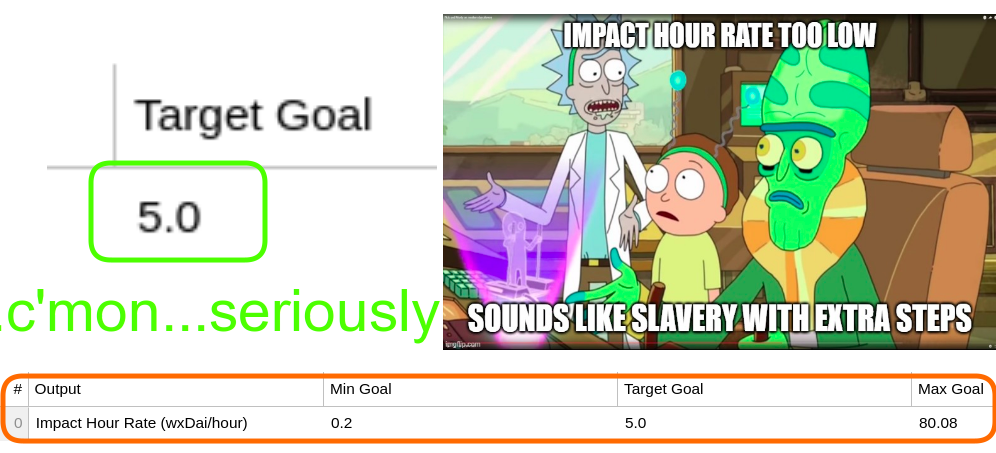
- Target Goal: Total amount of funds raised or expected amount of funds raised. Theoretical number for the purpose of running the simulation.
- Hatch period: How long the Hatch is open to collect funds.
- Hatch Minting Rate: The amount of TESTTECH that are obtained for 1 wxDAI (wrapped xDAI).
- Hatch Tribute: Specifies what percentage of the funds raised by the Hatch go to the Non-redeemable Pool.
- Membership Ratio: The amount of wxDAI (wrapped xDAI) each CSTK Token holder is able to send to the Hatch per CSTK. If the ratio is .005 wxDAI/CSTK then the user has to have 200 CSTK to send 1 wxDAI
- Impact Hour Rate at Target Goal: Sets the Minting Rate for Builders at Target Goal. One Impact Hour is equivalent to sending this amount to the Hatch.
- Impact Hour Rate at Infinity: The theoretical maximum impact hour rate that acts as the asymptote for the Impact Hour Rate curve.
Section 2: Dandelion Voting - Dandelion DAO Initialization
- Support Required: Percentage of tokens need to vote yes (of the tokens that were used to vote) for a proposal to Pass.
- Minimum Quorum: The percent of the total supply of the token that needs to vote yes in a vote in order for it to be passed.
- Vote Duration : This is the period of time it takes for a vote to pass or fail.
- Vote Proposal Buffer : The amount of time that must pass between the start of subsequent votes.
- Tollgate Fee: Requires a user to deposit this amount before creating a vote(this fee goes to the Redeemable Pool).
- Rage Quit Delay: The period of time after a vote passes before the vote can be executed. This gives hatchers that don’t approve of the vote an opportunity to leave the hatch before vote execution.
You can also hover over the (?) next to the inputs for the same information. If you’re caught up and feel confident then let us proceed!
Wielding your Hatch knowledge begin setting parameters on the Hatch dashboard. Starting with Section 1, you can use the sliders and input fields to set your inputs and then click on Run Simulation to see the graphical simulations and also the Outputs Overview table.
If you mess something up don’t worry, we have memes to let you know.
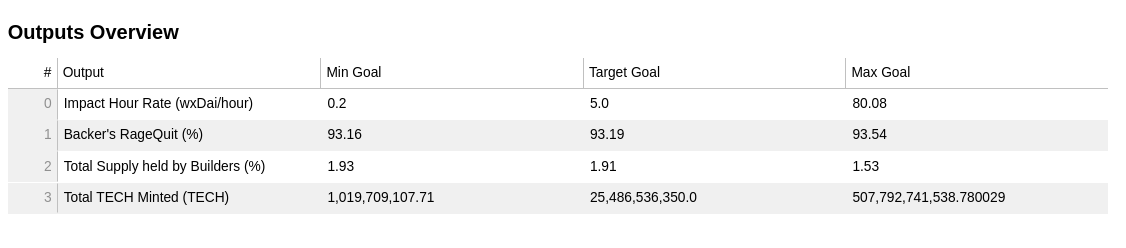
Check out the table displaying predicted Impact Hours, the TECH minted and the equivalent value in wxDAI to get a better idea of how your parameters will impact the value of tokens Builders will receive in the Hatch.
Once you have those nailed down, move on to Section 2 dealing with the Dandelion Voting Parameters. These parameters are a bit more intuitive and just like in Section 1, you can hit Run Simulation to produce the graphics that will help visualize the parameters you have chosen.
Hopefully you have contemplated your parameters and you should thus have no problem adding explanations to your decisions in Section 1 and 2 in the text fields below. This will help other members understand your params and add more credibility to your proposal. When you have had a good look over everything and you’re confident in your Hatch Parameters then press the button See Your Results! This will bring up a table summarizing your parameters and a short text description explaining further your chosen settings.

If you’re feeling really good about everything so far then you are ready to enter the final step, to share your genius amongst the TEC! The final button Share Your Results on Github! will create a github Issue in the TEC-Hatch-Vote repository that will contain all the details about your Hatch Proposal. Here you can leave any further comments or explanations and then submit your proposal. Your fellow TEC members will then be able to review, comment, critique, or perhaps iterate on your Hatch proposal. This creative process will eventually be taken to a vote on TokenLog.
The Hatch is a holistic venture into the uncharted depths of Token Engineering and only by our continual process of critical thinking and technical analysis can we hope to absolutely crush the Hatch Phase and move forward to the boundless future of the TE Commons.
If after going through this guide you still feel lost or want to make sure you get those parameters just right then GET IN ON THESE PARAM PARTIES. Find the next party on the TEC Calendar and jump in.
The Hatch is nigh, it’s time to participate and show us what you got!